Baby Chick Care 101: Brooder Setup and the First Eight Weeks
This page is a guide to caring for baby chicks during their first eight weeks, including setting up a brooder, what supplies you need, and how to choose your chicks. It walks you through each stage of their early life so you can ensure they grow healthy and strong.
Few things bring more smiles to a homestead than a box of peeping chicks. They’re usually the first livestock new homesteaders raise, and for good reason. Chickens are small, kid-friendly and forgiving, and within about five or six months they’ll start paying you back in eggs.
It’s fall as we write this, which is the perfect time to plan for chicks. Most feed stores and hatcheries have their best selection in late winter and spring, and a little preparation now means you’ll be ready when the peeping starts.
Key Takeaways
- Decide what you want from your flock (eggs, meat, kid-friendly pets or show birds) before choosing breeds.
- Set up the brooder before the chicks arrive, with safe heat, water, feed and bedding.
- Chick starter feed and clean water are non-negotiable.
- Most chicks can move outdoors at around six to eight weeks, once they’re fully feathered and the weather cooperates.
Choosing Your Chicks
Know your goals
- Eggs: Productive layers like Rhode Island Reds, Barred Rocks, Golden Laced Wyandottes, Australorps and sex-link hybrids.
- Dual purpose (eggs and meat): Buff Orpingtons, Wyandottes and Plymouth Rocks.
- Kid-friendly and small: Bantams such as Cochins and Silkies are gentle and popular for 4-H projects. Their eggs are smaller but perfectly good to eat.
- Colorful eggs: Ameraucanas and Easter Eggers lay blue or green eggs, and Marans lay dark chocolate-brown ones. Shell color doesn’t change the taste. What the hen eats matters more.
Where to buy
Local feed stores often carry chicks in spring, and online hatcheries ship day-old chicks by mail. Many areas have minimum orders for shipping, so consider sharing an order with a neighbor. If you only want hens, order “pullets” (sexed females), knowing that sexing isn’t 100% accurate. And check your local rules on flock size and roosters before you buy.
Setting Up the Brooder
A brooder is simply a safe, warm, draft-free home for chicks for their first several weeks. Set it up and warm it a day before the chicks arrive.
The container
A large plastic tote, a stock tank or a homemade wooden box all work. Plan for about half a square foot per chick at first, growing to 1–2 square feet per bird by four weeks. Chicks can flutter out surprisingly early, so add a mesh or hardware-cloth lid by week two or three.
Heat, safely
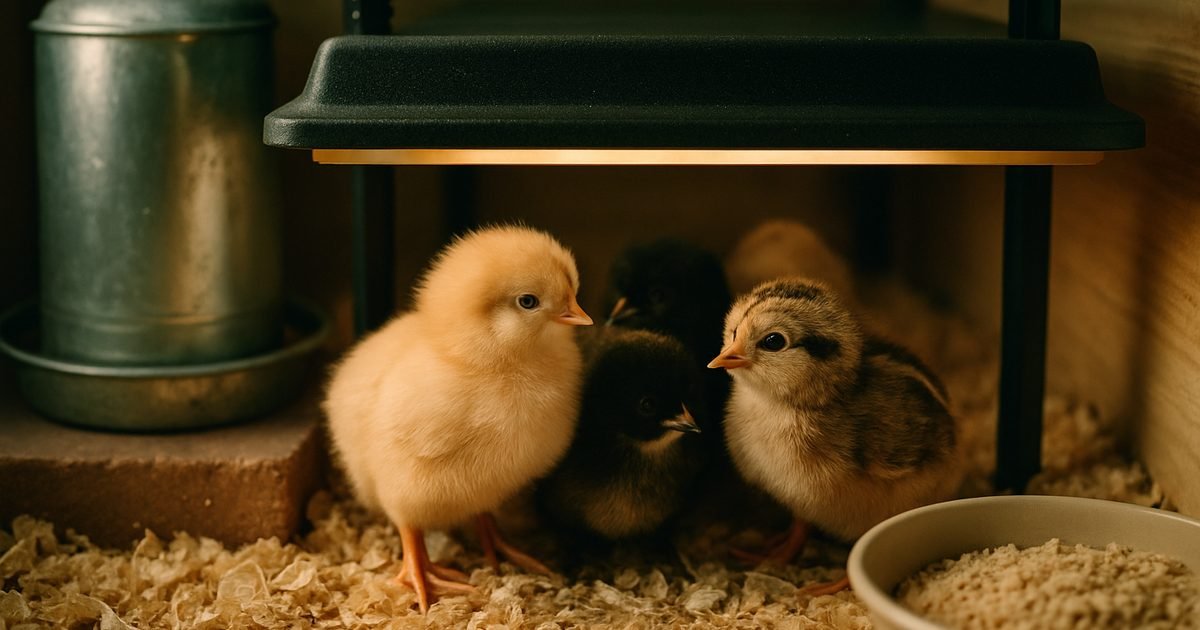
Newly hatched chicks need a warm spot of about 90–95°F in the first week. Lower it by roughly 5°F each week until they’re fully feathered.
- Radiant brooder plates (heating plates the chicks huddle under) are much safer than heat lamps and use less electricity.
- If you use a heat lamp, secure it with at least two methods so it can’t fall, keep it well away from bedding and walls, and use a lamp designed for brooding. Heat lamps cause many barn and garage fires every year.
- Give chicks room to move away from the heat. Chicks crowded under the heat are cold. Chicks spread out at the edges, panting, are too hot.
Bedding
Pine shavings are a classic choice. Avoid cedar, which has strong oils, and avoid slippery newspaper, which can cause leg problems. Paper towels over shavings for the first few days help chicks find their food.
Food and Water
- Chick starter feed: A complete starter crumble gives growing chicks the right protein and nutrients. Medicated starter helps protect against coccidiosis. Skip it if your chicks were vaccinated for coccidiosis, and ask your hatchery if you’re not sure.
- Water: Use a chick waterer with a shallow lip so chicks can’t drown. Set it on a flat paver or block so they don’t kick shavings into it, and refresh it daily. Dip each chick’s beak in the water when you first bring them home so they know where it is.
- Treats can wait. If you offer treats after the first couple of weeks, also provide chick grit so they can digest them.
Week-by-Week Snapshot
- Week 1: 90–95°F. Check on them often. Watch for “pasty butt” (droppings stuck to the vent) and gently clean it with warm water.
- Weeks 2–3: 85–90°F, then 80°F. Wing feathers appear. Add a lid and a low perch.
- Weeks 4–5: 75°F, then 70°F. They’re getting leggy and loud. Short supervised outdoor visits on warm days are fine.
- Weeks 6–8: Mostly feathered. If daytime temperatures are consistently mild and nights aren’t too cold, they can move to a secure coop.
Moving Outdoors
Before chicks move out, the coop should be predator-proof, with hardware cloth rather than chicken wire on openings, a secure latch and good ventilation up high. Plan for about 4 square feet per bird inside the coop and 10 square feet per bird in the run. If you have older hens, introduce the youngsters gradually, with a see-but-don’t-touch period of a week or two.
Frequently Asked Questions
How long do chicks need a heat source?
Usually until they’re fully feathered, around six weeks, depending on the weather and the breed.
Can I raise chicks in the house?
Yes, but chicks create a lot of fine dust. A garage, mudroom or basement is often a better choice, as long as it’s draft-free and safe from pets.
When will my hens start laying?
Most start laying at around 18 to 24 weeks, depending on breed and season. Fall-hatched pullets may wait until the days lengthen in spring.
Chicks are a wonderful first step into raising animals. If you’re still planning your flock, our guide to 9 small steps to a backyard homestead shows how chickens fit into a small homestead, and common homesteading mistakes explains why it pays to add animals slowly.
Get a printable barns, coops and pens checklist in our free Animals, Skills & Planning pack, available in our Free Downloads library.
Prefer to watch or listen? More practical homestead tips are on our YouTube channel — short, useful, no fluff. Subscribe on YouTube → The Homestead Frontier
Get Weekly Homestead Know-How That Actually Works
Practical tips on gardening, food preservation, DIY repairs and self-reliance, straight to your inbox. Free, no fluff.
Free. Unsubscribe anytime. We never share your email.