How to Build a Simple Root Cellar (and Easy Alternatives If You Can’t Dig)
This page explains how to build a simple root cellar to store your homegrown vegetables and fruits and keep them fresh for months without using electricity. It includes step-by-step instructions and alternative options if you can't dig, like using a basement corner or a buried container.
There’s something deeply satisfying about walking down a few steps in January and coming back up with an armful of potatoes, carrots and apples you grew yourself. Before refrigerators, nearly every farmhouse had a root cellar. Many homesteaders are building them again, because they keep food fresh for months using nothing but the steady cool of the earth.
In this guide we’ll cover how a root cellar works, what it needs, the basic steps to build one, and a few simpler options if a full dig isn’t in the cards this year.
Key Takeaways
- Most root crops store best at about 32–40°F with high humidity, around 85–95%.
- Good ventilation matters as much as cold, because it clears out moisture and ripening gases.
- Keep apples and pears away from potatoes and other vegetables.
- You don’t need a dug cellar to start. A cold basement corner, buried container or unheated garage can work.
How a Root Cellar Works
A few feet below the surface, soil temperature stays fairly steady year-round, cool in summer and above freezing in winter in much of the country. A root cellar uses that thermal mass to hold produce in a cold, dark, humid environment that slows spoilage and sprouting without any power. Three things make it work:
- Temperature. Cold, but not freezing.
- Humidity. Moist air keeps roots from shriveling.
- Ventilation. Fresh air in, stale air and excess moisture out.
Picking the Right Spot
- Use the landscape. A north-facing hillside is the classic choice. You can dig straight in, it stays shaded, and drainage is natural.
- Stay out of wet ground. Avoid low spots and areas with a high water table. A flooded cellar is a ruined cellar.
- Keep it close to the kitchen. You’ll use it more often if it’s a short walk in the snow.
- Call 811 before you dig. It’s free, and it keeps you from hitting buried utility lines.
Building a Basic Dug Root Cellar
Every site is different, so treat this as an overview rather than blueprints. For anything deep, get advice from someone experienced or a local builder, and check whether your county requires a permit.
- Size it to your harvest. A family of four storing potatoes, carrots, beets, cabbage, squash and apples can often get by with roughly 6 x 8 feet.
- Dig to a stable depth. Many cellars sit 6 to 10 feet into a hillside, or with the floor several feet below grade. Never work in an unshored trench deeper than about four feet, because soil collapses are deadly.
- Build strong walls and roof. Concrete block, poured concrete, stone or rot-resistant timber are common. The roof must carry the weight of the soil over it, often 2 feet or more, so this is where professional advice pays off.
- Mind the floor. A plain earth or gravel floor helps humidity and drainage. Add a drain or gravel sump if the site tends to be damp.
- Add two vents. A low intake vent brings in cold fresh air, and a high exhaust vent near the ceiling lets warm, moist air and ethylene escape. Screen both against rodents.
- Insulate the entry. A tight, insulated door, or a double door with a small vestibule, keeps the cellar from freezing in deep cold and warming up in spring.
- Build slatted shelves and bins. Use untreated wood, and leave a few inches between the walls and shelving so air can circulate.
What to Store and How
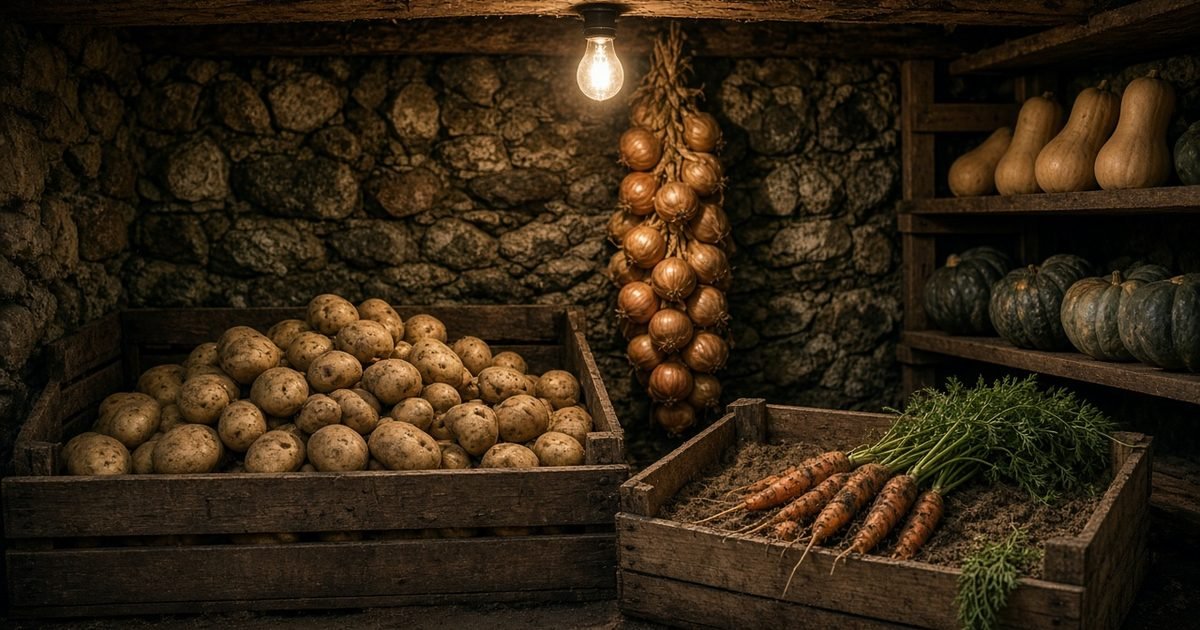
- Potatoes. Cure for a week or two somewhere around 50–60°F, then store in the dark in bins or burlap. Light turns them green.
- Carrots, beets and parsnips. Trim the tops and pack them in damp sand, sawdust or peat in crates.
- Cabbage. Wrap heads in newspaper, or hang them by the roots. Cabbage smells, so give it its own corner.
- Onions and garlic. These like it cool but dry, so they often do better in a dry pantry or upper shelf than in the damp cellar.
- Winter squash and pumpkins. They prefer it warmer, around 50–55°F, so a cool basement or closet often suits them better.
- Apples and pears. They give off ethylene gas that makes potatoes sprout and cabbage go bitter. Store them separately or near the exhaust vent.
Keeping It Running Through Winter
- Put a thermometer and a humidity gauge (hygrometer) inside and check them weekly.
- Open or close vents to adjust: open on cold nights to cool it down, close during hard freezes.
- Sprinkle water on an earth floor, or set out pans of water, if humidity drops.
- Check produce often. As the old saying goes, one bad apple spoils the bunch. Pull anything soft or moldy right away.
- Use the oldest produce first and keep a simple inventory list by the door.
No-Dig Alternatives
Not ready to excavate? Try one of these:
- Basement corner cellar. Wall off an unheated corner on the north side, insulate the interior walls, and vent it to the outside.
- Buried container. A clean metal garbage can or an old chest freezer (with the latch removed) buried in the ground and topped with straw bales can hold a surprising amount of roots.
- Garden clamps. Pile root crops on straw, cover with more straw and a layer of soil. It’s an age-old method that still works in milder climates.
- Unheated garage or porch. Insulated coolers can hold steady temperatures through a mild winter.
Frequently Asked Questions
How long will vegetables keep in a root cellar?
It varies by crop and conditions. Potatoes, carrots and beets often last four to six months, and good keeper apples can last several months too.
Can I store home-canned food in my root cellar?
Yes, as long as the jars won’t freeze. Cool, dark and dry shelves are ideal for canned goods, so keep them away from damp walls that could rust the lids. See our water bath canning guide for safe canning basics.
What if my cellar gets too warm in fall?
Open the vents at night to pull in cool air, and close them during warm days. Many homesteaders wait until nights are reliably cold before loading the cellar.
A root cellar is one of those projects that pays you back every winter for decades. Pair it with our fall winterizing checklist and you’ll be heading into the cold months well stocked.
Get a printable root cellar checklist in our free Food, Pantry & Kitchen pack, available in our Free Downloads library.
Prefer to watch or listen? More practical homestead tips are on our YouTube channel — short, useful, no fluff. Subscribe on YouTube → The Homestead Frontier
Get Weekly Homestead Know-How That Actually Works
Practical tips on gardening, food preservation, DIY repairs and self-reliance, straight to your inbox. Free, no fluff.
Free. Unsubscribe anytime. We never share your email.